July 8, 2011

Don't make me blush!

This blush wedding is absolutely the most romantic thing I've ever seen. It's soft, girly, and has that fresh "I just got pinched on the cheek" look.

This color palette is definitely worth looking into if you want all of your guests to fall in love at your wedding. Hey, I really think it could happen! Just know that you will be solely responsible for the bad choices they make during the reception. Can't say I didn't warn you.


Center: shoes
First row: bride, bouquets, macaroons, bridesmaids
Second row: bouquet, place setting
Third row: couple, cake
Fourth row: dress, table number, vase, boutonniere


blush colored wedding

DIY: Blooming Favors

Wedding favors can be a waste of money, especially if it's something  your guests are just going to take home and throw away. That's why I love the idea of these tulip favors: they can be enjoyed even after your wedding is over! They're cheap, easy to make, and will look adorable sitting at your place setting. They would be great for an outdoor or garden-themed wedding, or dress them up for a more traditional affair. If you want to get clever you can always put in a cute saying that has to do with flowers like something to do with  your love "blooming" or "growing". Get creative!

Thanks Project Wedding for sharing the idea.


DIY: Tulip Bulb Favors article photo
Mary Swenson
These seasonal favors are easy, inexpensive, and oh-so-charming!  Put them atop each place setting, arrange them en masse on a favor table, or even group them together in the center of each table for a casual centerpiece that guests can easily take home at the end of your event.
We picked up small pots of bulbs in bloom at our local grocery store for $3.99 each; each pot had 3 flowers in it, which averages to $1.33 per stem.  (Tulips are a colorful and widely-available choice; hyacinths are also a pretty, very fragrant alternative.)


We removed each bulb from the pot and planted it in a small plastic cup.  Each cup was placed inside a mini brown paper bag, decorated with guests' initials.  (If you're using a group of these flower bags as a centerpiece, you can write the table number on each one.)  We punched holes at the top of each bag, and added grommets to the front holes for a finished look.  Stringing ribbon through the holes is a pretty finish, and also keeps the flowers straight in the bag.


Sources:  Mini paper bags can be found at Paper Mart; small white cups by Solo; white paint pen by Elmer's; ribbon and grommets from Michaels
Images Courtesy: Mary Swenson

1940's Wedding

At the end of June I was lucky enough to be in a wedding for two of my good friends Nick & Kayla. Their wedding was such a unique 40's themed affair that I felt the need to make an post inspired by their wedding. The 1940's have such a classic vintage feeling. Suspenders, bird cage veils and pin curls pull the look all together to make you feel like you're living in this booming era.
1940s inspired vintage wedding
Photos courtesy of Style Me Pretty

Oooo, pretty!

With my own wedding coming up in a little over a year, I have been spending hours scouring the internet for centerpiece ideas that I like. It seemed pretty easy to me, until my fiancée and I booked our reception venue. We are having it at YOLO, which is a new reception hall that is hooked onto a night club. So, the place is pretty dark: think black ceilings, gray/silver walls, etc. I've realized that not just any old centerpiece will work for a place like this. Anything I do will just get lost in the dim lights of the room.

Finally, after much searching, I think I've got it: light up centerpieces! Sounds trashy, right? I don't want my reception looking like Showgirls III, for obvious reasons. Luckily, I've found some pictures that I think look up-scale and fun, without any of the sleeze. So here they are. What do you think?

July 7, 2011

Drunk on Sugar @ the Candy Bar

I love the idea of a candy bar at weddings. It's tasty, it looks pretty, it keeps the kiddos occupied for a while, and you've instantly got something to send home with your guests (leave out cute plastic baggies and voila: favors!). Candy bars tend to look best if done in monochromatic colors, so it's usually best to avoid really bright, multicolored candies. Here's some of my favorites:
Photos courtesy of Style Me Pretty & The Knot

Rustic-Chic Wedding

rustic chic wedding
Photos courtesy of Style Me Pretty & The Knot
Rustic & chic. Two words that, by definition, should not go together. However, when they are blended seamlessly into every minute detail of a wedding from the bouquets, to the setting, to the centerpieces, they make for a beautiful experience. There is something so elegant about a wedding that can take non-traditional mediums and make them into a wedding more stunning than one that decks everything out in rhinestones. Who am I kidding? FAR more elegant. This type of wedding is great for outdoor venues because it has a kind of airy, woodsy feeling that is further solidified by being in the great outdoors! Find your inner tree-hugger and enjoy.

July 6, 2011

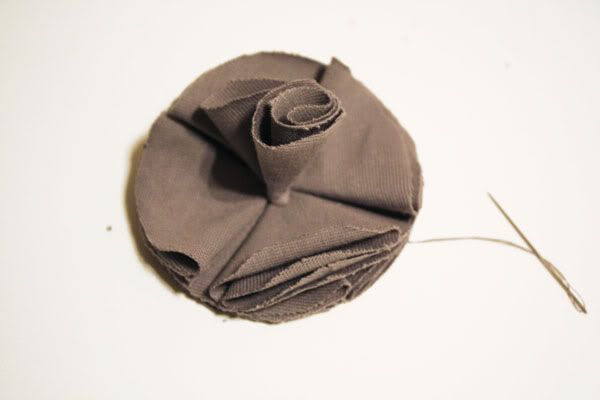
DIY Fabric Flowers

DIY Wedding Challenge 2010: Fabric Flower  article photo Flowers, Hair, Diy, Fabric

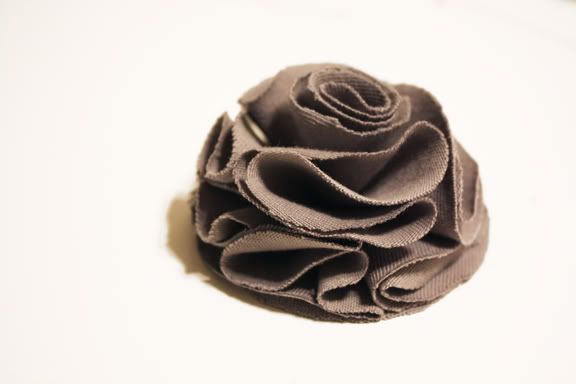
These are beautiful fabric flowers that even the least craft-adept person can manage. You just need to know how to work a thread and needle and you'll be on  your way to sticking these babies everywhere: headbands, sashes, bobby pins, centerpieces, you name it! Thanks projectwedding.com for the idea.


Materials:
Fabric (anything works – from silk organza to your old bedsheets)

Needle

Thread (in a color that matches the fabric)
Large circular object (for tracing around)

Medium circular object(about ¼” – ½” smaller in diameter)
Small circular object  (about 1” in diameter)

Scissors

Process:
1. Trace the large circular object onto your fabric 9 times.
2. Trace the medium circular object onto your fabric 1 time.
3. Trace the small circular object onto your fabric 1 time.
4. Cut out all 11 circles.
5. Set small and medium circles aside.   Take a large circle and fold it into quarters.
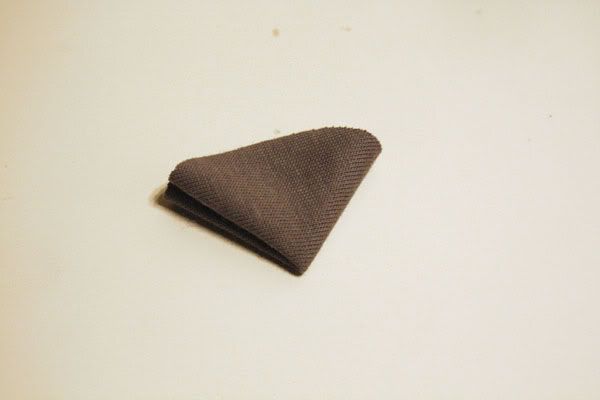


6. Place this quarter on top of another large circle.
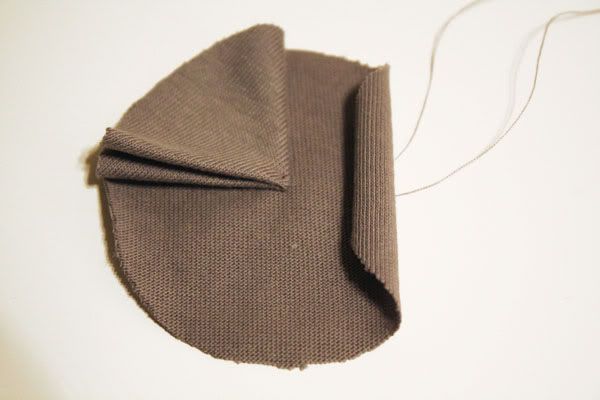

7. Using a needle and thread, sew the tip of the fabric quarter onto the flat circle.  Make sure you sew through all the layers.
8. Take 3 more large circles, fold them into quarters, and continue to lay them out onto the circle.  To keep the flower perfectly balanced and proportional, make sure all the openings face the same direction. Sew each quarter as you lay it down.  After all 4 quarters have been laid out and sewn, sew a couple times between the quarters to connect them together.
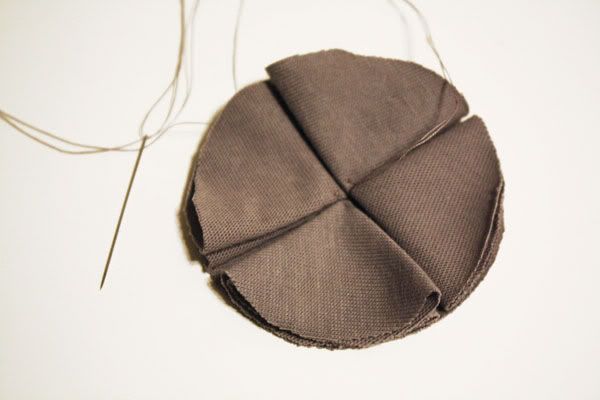

9. Fold another large circle into quarters.  Place this directly on top of another quarter on the bottom layer, and angle it 90 degrees. Again, make sure the opening faces the same direction as the quarters on the bottom layer. 
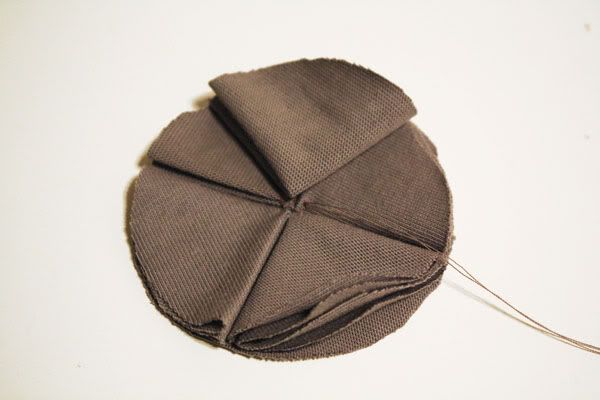

10. Sew the quarter onto the bottom layer.
11. Repeat this using 3 more of the large circles.  This should form an entire top layer.
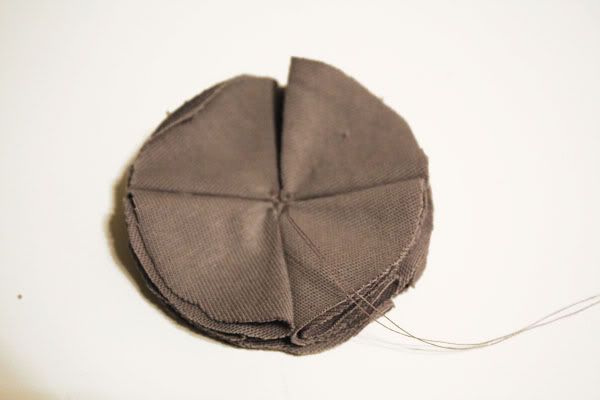

12. After the top layer has been completed, remember to sew between the quarters again.
13.  Take the medium circle now and fold it in half.


14. Roll it up into a cone shape.
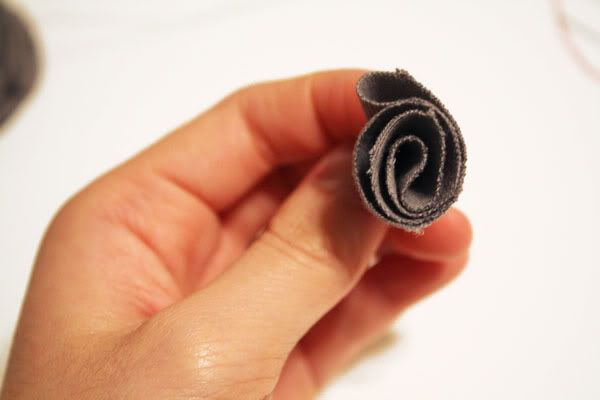

15. Place it flat against the top layer with the tip pointing toward the center.  Sew the very tip into place.  It should be able to stand upright when you are done.
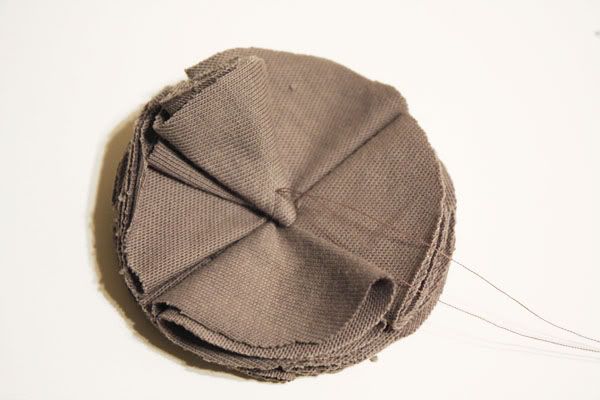

16. Flip the flower over.  Take the smallest circle fabric and sew it onto the back to cover up your stitches.  If you are attaching a hair clip or headband to the flower, put it between the flower and the small circle fabric.  Sew the circle into place with the hair clip headband sandwiched inside it.
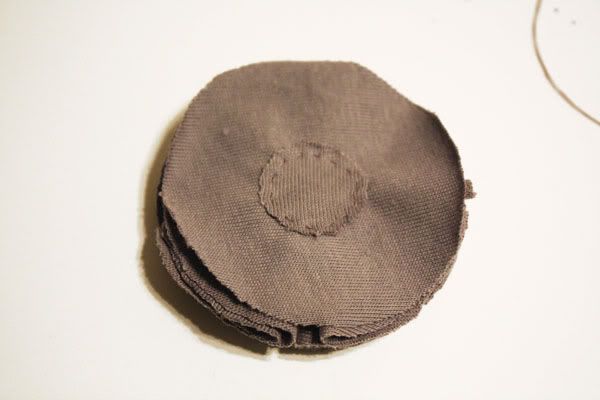

17. Flip the flower over again and fluff it up!
Share

Widgets

Related Posts Plugin for WordPress, Blogger...

Google Analytics